The Problem
Field power is a mess. If you’re running a harmonic mount, a Raspberry Pi (P.I.N.S), dew heaters, and a DSLR/AstroCam, you end up juggling multiple power banks, wall warts, and cables snaking across the ground.
In my case:
- Harmonic Mount: 12V DC 1.5 Amps Max draw
- P.I.N.S controller (Raspberry Pi): 5V DC Max 2 Amps draw
- DSLR: needs ~8V via a USB dummy battery converter
- Guide Camera connects to Raspberry Pi
- Dew heaters: 12V or 9V depending on load max 500 ma draw
Standard 12V power banks tap out in under 2 hours, and carrying separate USB banks for 5V gear just adds bulk. So I built a single LiFePO4-powered distribution box that acts as a field UPS and feeds everything from one clean source.
The Solution
A single LiFePO4-powered distribution box with one DC input, simultaneous charging, and multiple regulated outputs.
Specs at a Glance
Table
| Feature | Detail |
|---|---|
| Battery | LiFePO4, 6Ah or 12Ah (user-swappable capacity) Or you can even use a Lead Acid Battery |
| Input | DC barrel jack for charging + passthrough |
| UPS Function | Simultaneous charge & discharge supported |
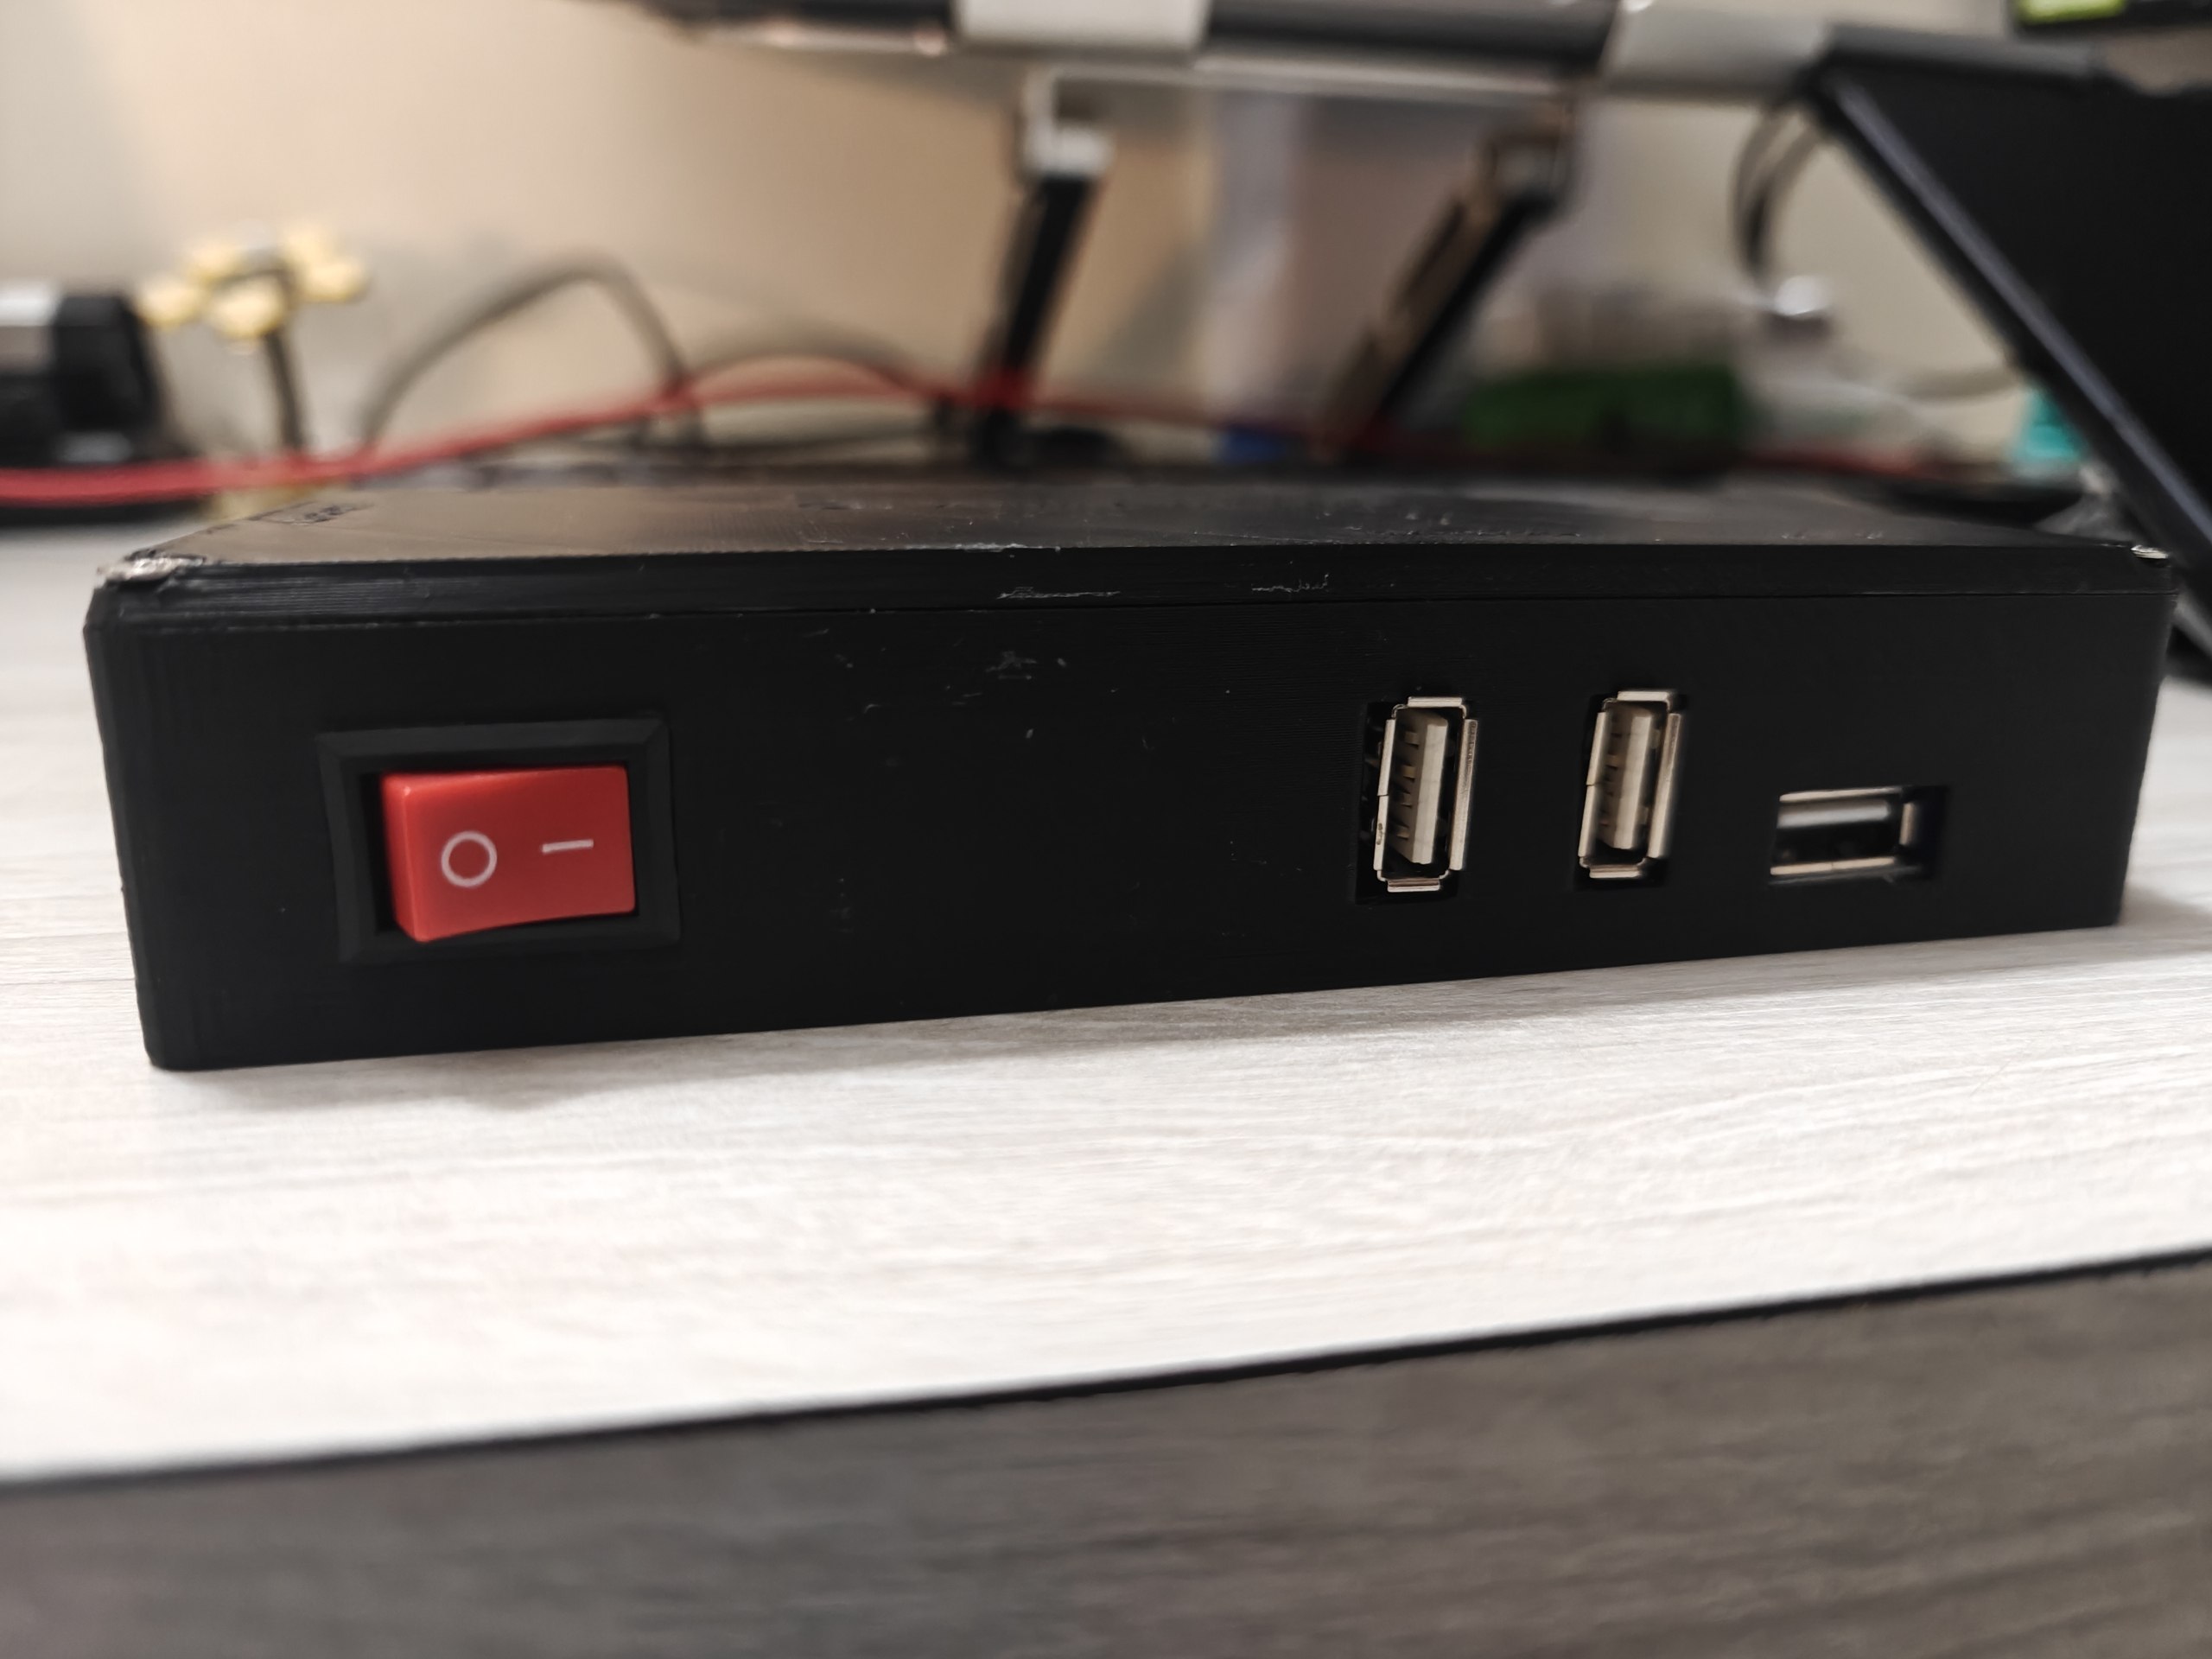
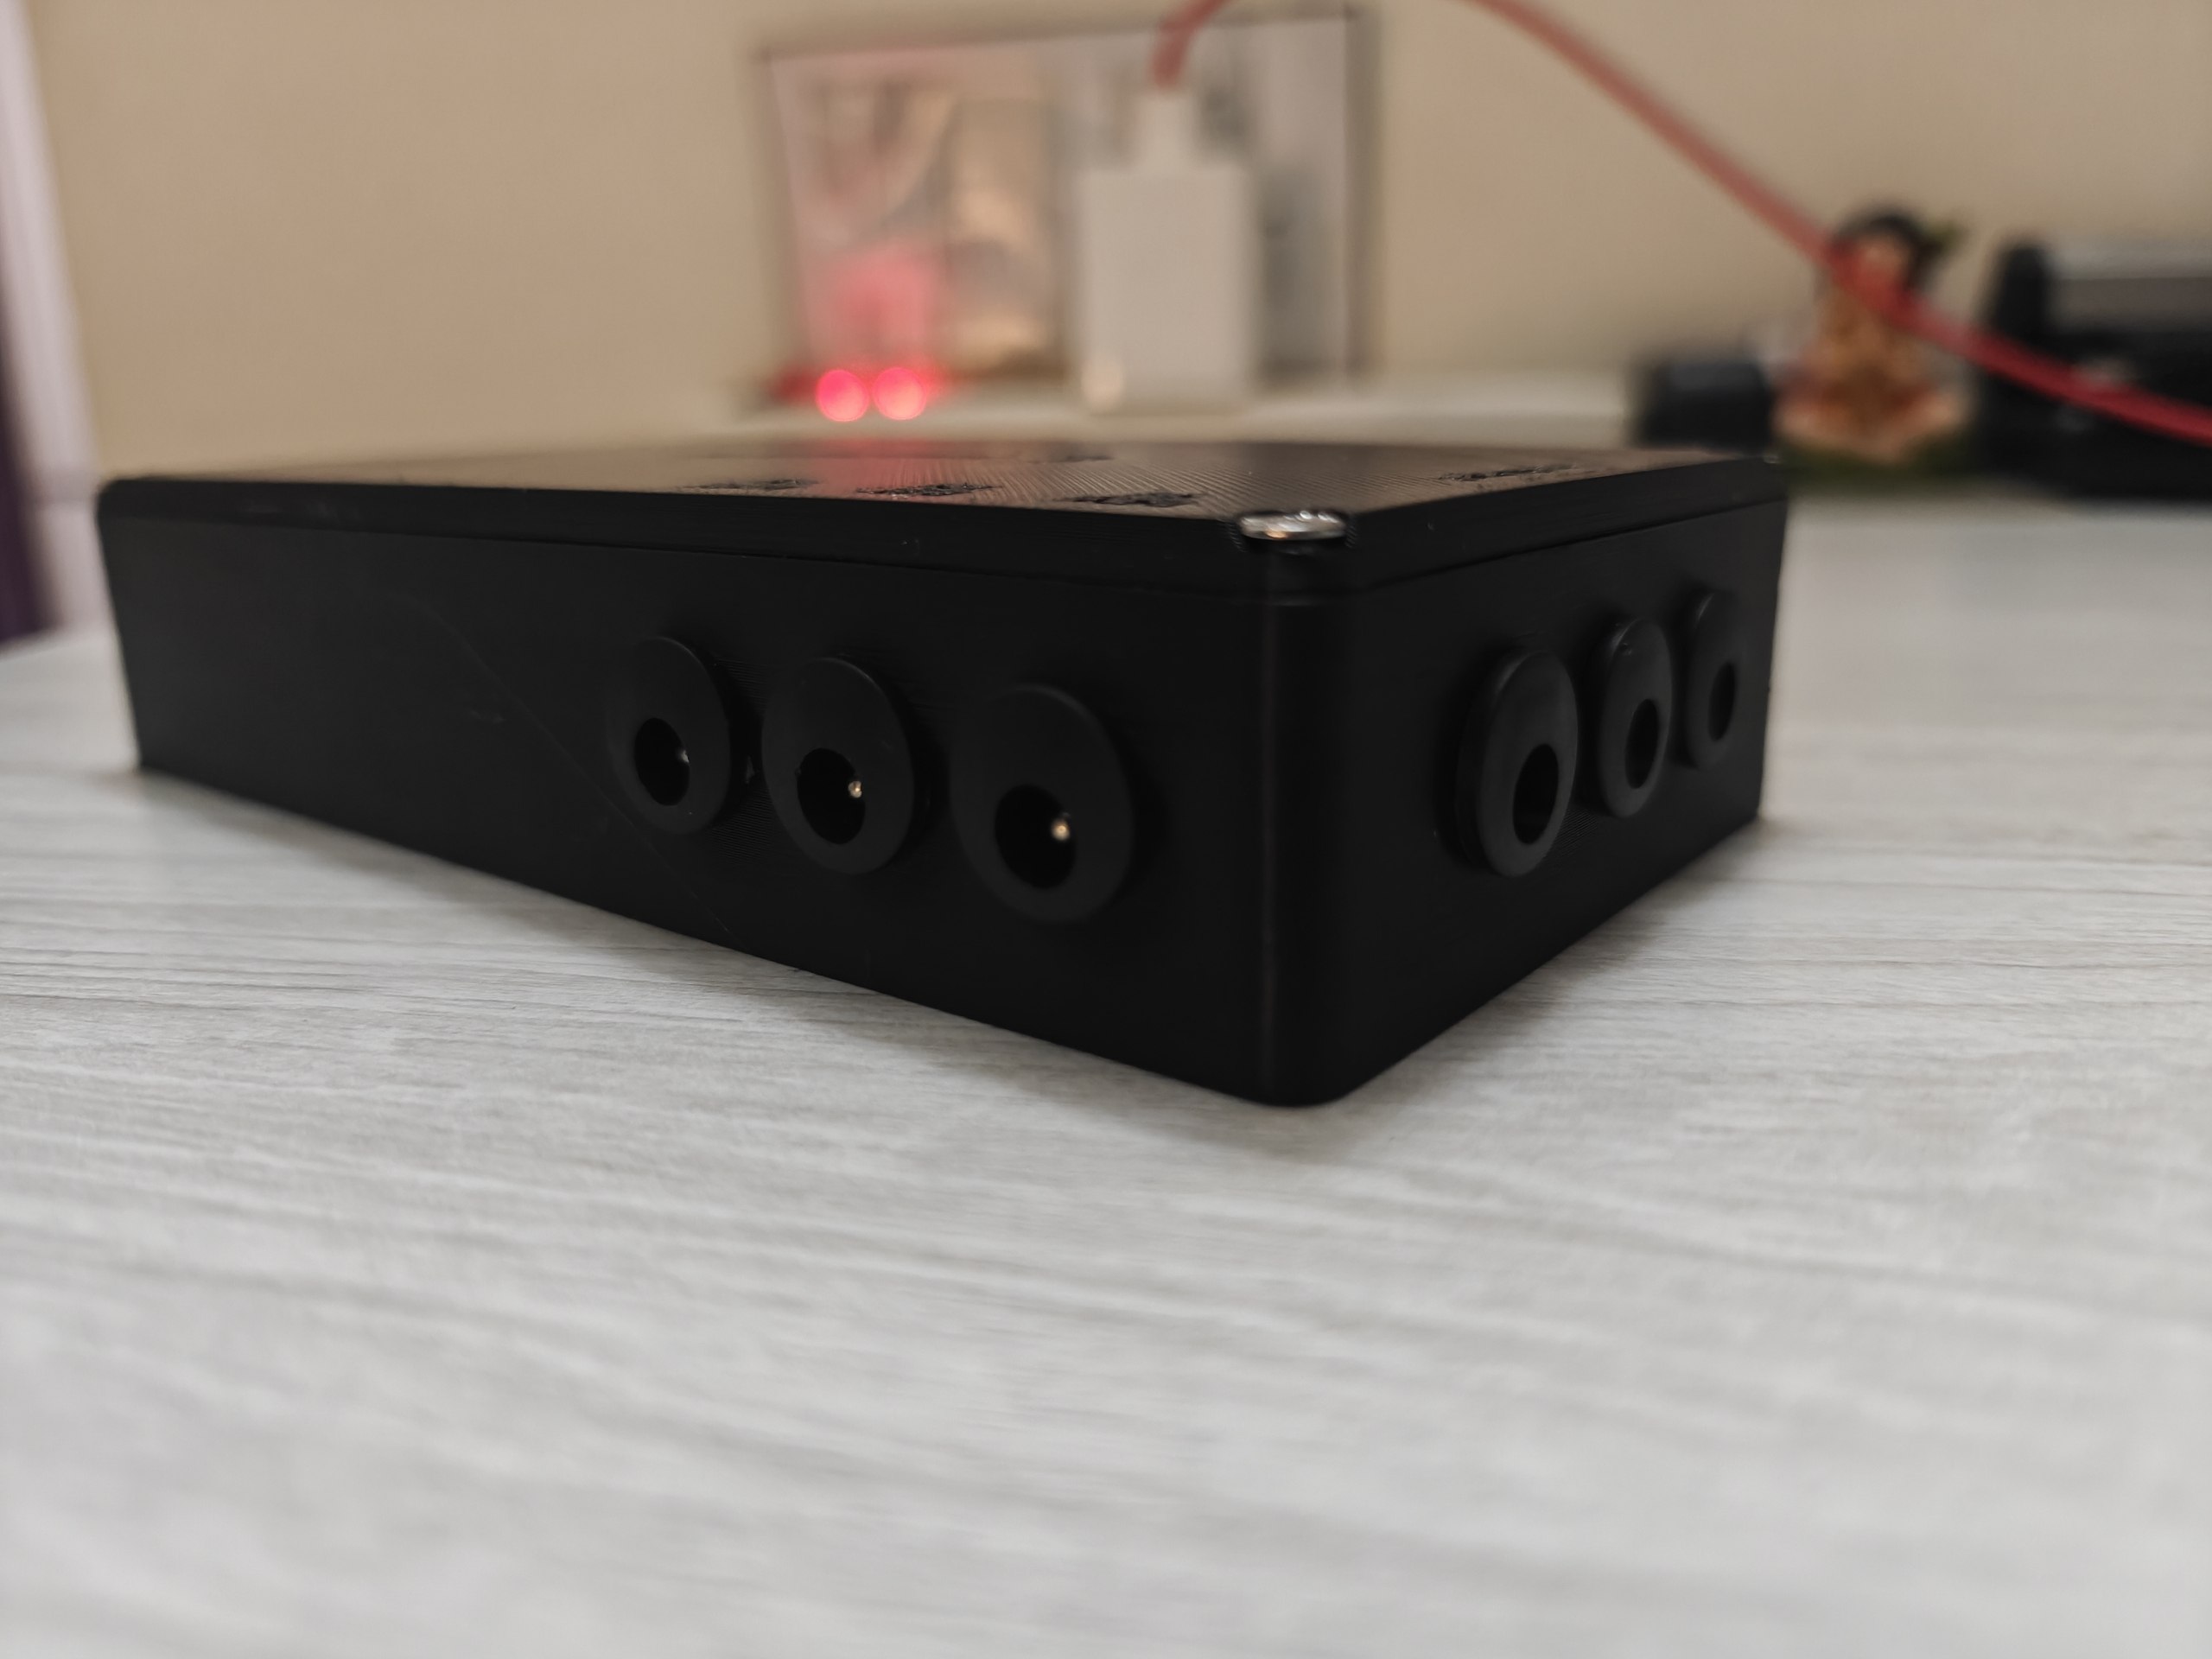
| 12V Rail | 3x DC barrel jacks for mount, main heaters, etc. |
| 9V Rail | 1x DC barrel jack for low-power dew heaters (not USB PD) |
| 5V Rail | 1x USB-A (5V/5A peak, 3A continuous) for Pi/controllers |
| Aux 5V | 2x vertical USB ports for DSLR dummy battery converters or accessories for less than 2Amps draw. |
| Control | Front-panel power switch for instant shutoff |
How It Works
- LiFePO4 Battery — Safer than LiPo in cold field conditions, flat discharge curve keeps voltage stable as it drains. 6Ah gets me ~5–6 hours; 12Ah doubles that.
- Simultaneous Charge/Discharge — Plug into mains at home or a field battery; the box charges while still powering your rig. Unplug, and it switches seamlessly to battery—behaves like a true UPS.
- Buck Converter — Steps battery voltage down to a clean, regulated 5V. Rated for 5A peak (3A continuous), so it won’t sag under Pi + SSD + camera control load.
- 9V Tap — Simple buck or LDO off the main rail for heaters that don’t need full 12V, saving power and reducing heat.
- Front Switch — Kills all outputs instantly without fumbling for barrel jack disconnects in the dark.
Why This Over Off-the-Shelf?
Table
| Commercial Option | This Build |
|---|---|
| Rs.25,000+ “astro power tanks” with proprietary everything | Under Rs:600 in parts if you have a battery, 3D printing charges ~Rs: 600 |
| Fixed capacity, non-swappable | Swap 6Ah ↔ 12Ah ↔ 18Ah LiFePO4 as needed Or even with a 12V Lead Acid Battery - you get options to rent this at remote places like Leh/Hanle |
| 12V output + USB ports (limited to 2 Amps draw max) | 3× 12V, 1× 9V, 3× 5V outputs & Highly customisable |
| Cannot be carried in Flights | Just a plastic enclosure with No battery, can be thrown in Check-in & weighs under 250 Grms |
Design & Build:
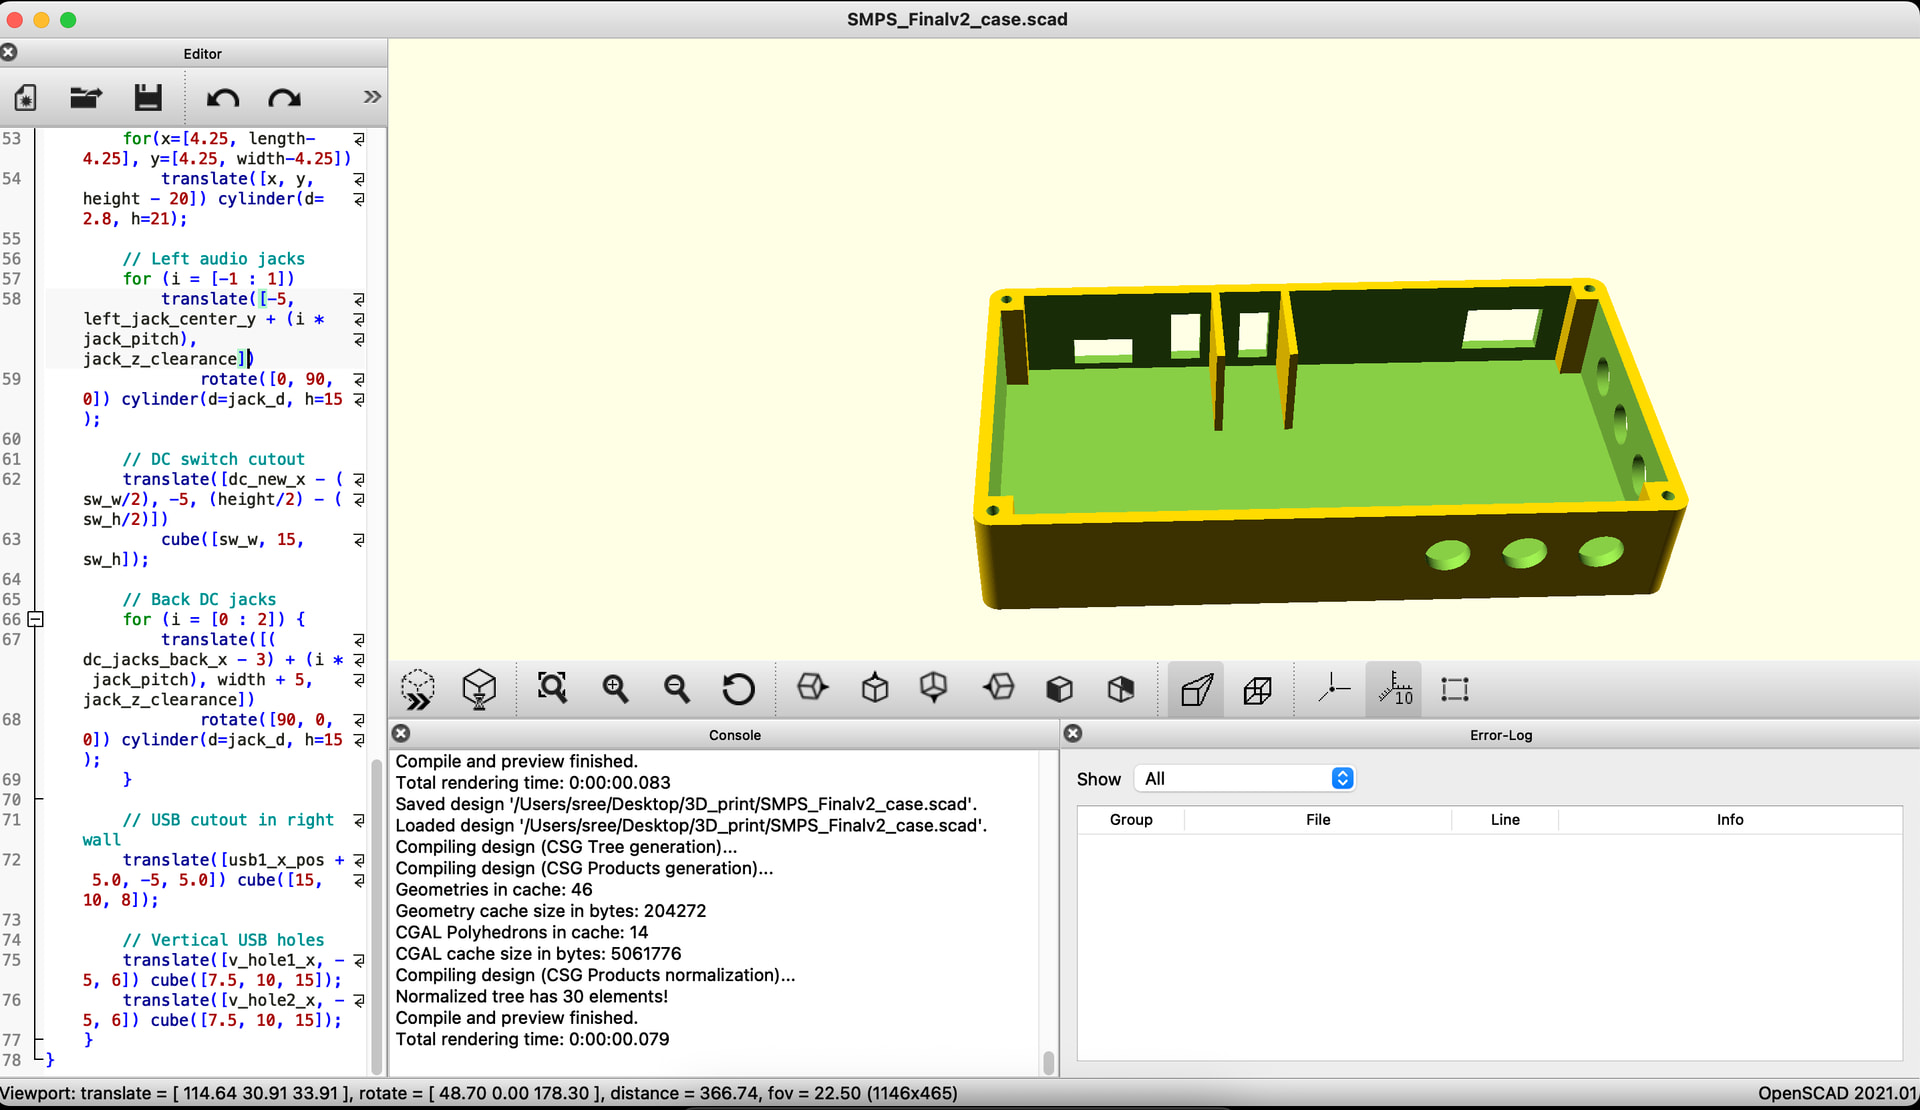
I’m a novice when it comes to 3D print design and I took help of Gemini to build this simple enclosure using OpenScad and converted this as a STL and printed it using online service.
To my surprise the measurement and fitment of all parts came as expected.Though I had to swear at the AI agent multiple time to get the desired alignments ! lol
The files are are split into two parts Lid and Case and can be downloaded from here.
Circuit Design:

Final Product:
Heating issues:
With all devices connected and measured, the PCBs will stay warmth to touch and does not get hot. So heat is self contained and will keep the dew away.
The only part that will get extremely hot is the LiFePo4 charger, Since it is kept out of the equation & an external adaptor is used, there is no need to worry about the 3D printed case becoming hot / melt away. Its optional that you keep this adaptor connected to the enclosure or charge the battery separately when you can.
Please do not use this setup to charge mobile phones as it draws ~2Amps constant current and might cause heating problems and melt the case.
Parts List:
Total cost ~ Rs: 650 of spares excluding battery and charger.
- 3 X 12V Stable DC Output with a Max current draw of 3 Amp and 5 Amp bursts | No heatsink required Link to Buy | This part is optional, but if you are planning to Charge LiFePO4 battery the input voltage might fluctuate around 13-14.5 V and its safe to add this to deliver clean 12V output to the DC jacks.
- Optional 1 x 9v 2 Amps stepdown converter - This can be used to power Dew heater at a reduced capacity. DO not use this as PD to charge USB-C Type devices - Link to Buy
- 1 x 5V 5Amp Stable DC stepdown converter - This can be used to power Raspberry Pi4/5 | No heatsink required . Link to Buy
- 2 x 5V 2Amp Step Down converter - This can be used to power other USB accessories like DSLR Dummy battery, Small LED Lamps etc… | NOT Advisable for charging Phones / Power Bank as this circuit will become extremely hot and melt the case ! if current draw exceeds 1.5 Amps continuously Link to Buy
- 4x M3 16MM Hex screws to close the lid Link to Buy
- LiFePO4 12V 6Ah/12Ah/18Ah battery Link to Buy
- LiFePo4 charger Link to buy
- 6 x DC Jacks Link to buy
- 2 USB PCB Link to buy
- 1x Switch Link to buy